How to Recover Deleted Photos from SD Card?
- The ultimate tool that restores media deleted from SD Card storage
- Images, video and audio having any file type extensions can be easily extracted with a quick scan
- File recovery from formatted, damaged or unreadable memory card is also possible
- Supports all brands and types SD cards


Requirements: Microsoft Windows 10, Windows 8, Windows 7, Windows Vista, Windows XP, Windows 2003 and Windows 2008


Requirements: Mac OS X 10.5.X and above (including Sierra, El Capitan, Yosemite, Mavericks, Leopard, Snow Leopard and Lion)
Recover Deleted Pictures from SD
No doubt, everybody likes to take pictures and make collections of sweet memories of life. If pictures taken of some special occasions is missed or deleted by mistake, and then this gives an immense grief for users. Whether you are a professional photographer or you love to make collections of your red letters moments of life as your hobby, it is common to commit on a mistake and thus deletion of your precious picture is possible. However, if such accidents happen with you, then need not worry about it, recovery of deleted pictures from your camera or other popular image storage device like SD card, USB, and a flash drive is very much possible by use of provided tool.
In spite of careful handling of images of your valuable moments, there are numerous possible reasons which cause deletion of photos from various storage devices are like accidental deletion of pictures from SD card, use of Shift-Delete command, loss of image during a transfer from one device to other and many more.
Let’s take a real-time scenario where accidental deletion generally happens. Suppose, the user connects SD card to the computer and while viewing images stored on it, and finds some images unattractive or due to some other aspect user want to delete it from the SD. Unlike photos deleted from system go to Recycle Bin, pictures deleted from an SD card is deleted permanently and it does not get stored on the system’s Recycle Bin and thus, the user assumes that it is gone forever and regret on his/her did. But this is not the truth, it is essential for those people to know that the deleted photos are not actually permanently deleted from the SD card instead, their entry from file allocation table simply has been un-indexed marked as available for further storage while data physically still lies there. Recovery of such cool photos is possible; to Restore Deleted Pictures from SD all you need to do is useful tool which is capable to recover photos.
Another reason for photo eraser from storage drive is the attack of virus or malware to the folder containing images, such folder is deleted by antivirus programs and consequently, photos contained within are also deleted along with that. Apart from this transferring of snapshots among various devices increases the chance of photo loss.
To rescue images, first of all, stop using the SD card as early as you come to know that some important snapshot has been deleted. After that, you can use picture recovery tool which is especially armed with special features for image recovery. Photos or any other file which is deleted from a professional camera like Nikon or Canon can be revived by making use of Nikon Canon Photo Recovery tool. It can recover photos from various formats including JPG, TIFF, JPEG, PNG, and supports various flash memory cards including SDHC, SD, xD, MMC, SDXC, Memory Stick etc. Specific files from different cameras can be rescued like Nikon NEF file recovery can be easily accomplished by using given utility.
Requirements: Microsoft Windows 10, Windows 8, Windows 7, Windows Vista, Windows XP, Windows 2003 and Windows 2008
Steps to Recover Deleted Pictures from SD Card
Step 1: Download, and instal the free version of Nikon Canon Photo Recovery Software on your system, and launch it. Now, connect the SD card to the system. From the main screen, choose Recover Photos option. Then, a list of logical and physical drives available in the system are displayed. Just select the drive representing the digital memory card, and hit Scan button to initiate the scanning process.
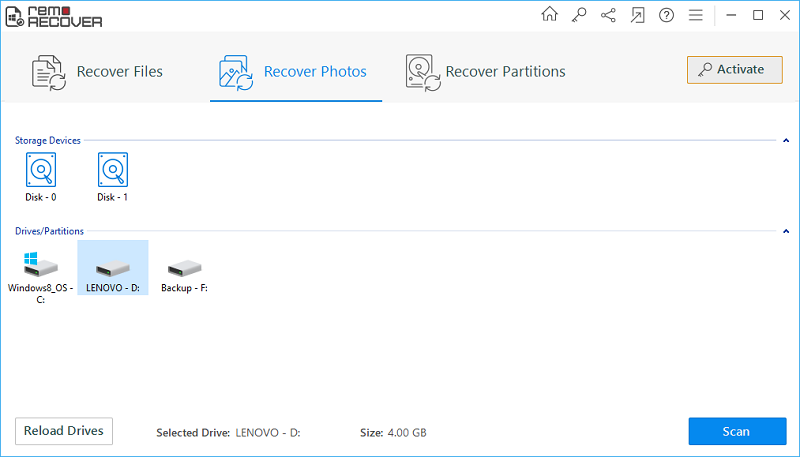
Figure 1: Home Screen
Step 2: Now the software scans the digital camera card to find deleted and lost photo files. Wait for the scanning process to get completed, as shown in Figure 2.

Figure 2: Scanning the Camera Card to Find Deleted & Lost Photos
Step 3: Upon the completion of scanning and recovery process, a list of recovered photo files are displayed on the screen. You can view recovered photo files in Data View, and File Type View
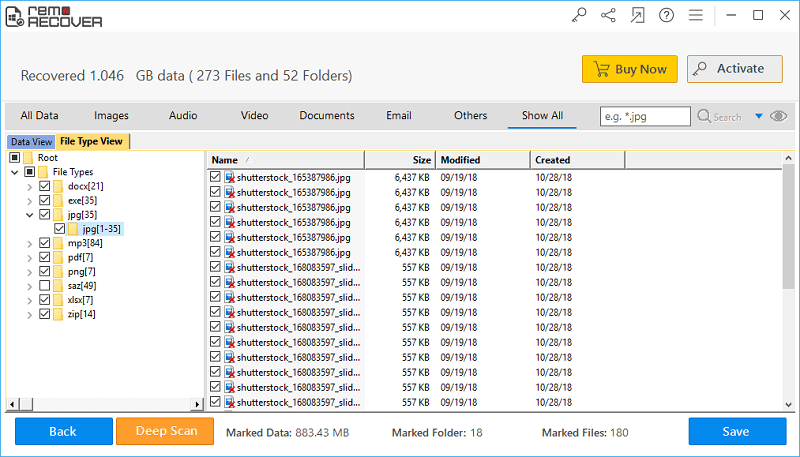
Figure 3: Recovered Photo Files in Data View & File Type View
Step 4: Prior saving the recovered photos, the tool allows you to preview the recovered photos. Just double click or right-click on the respective photo file, and click Preview option to preview a photo file.
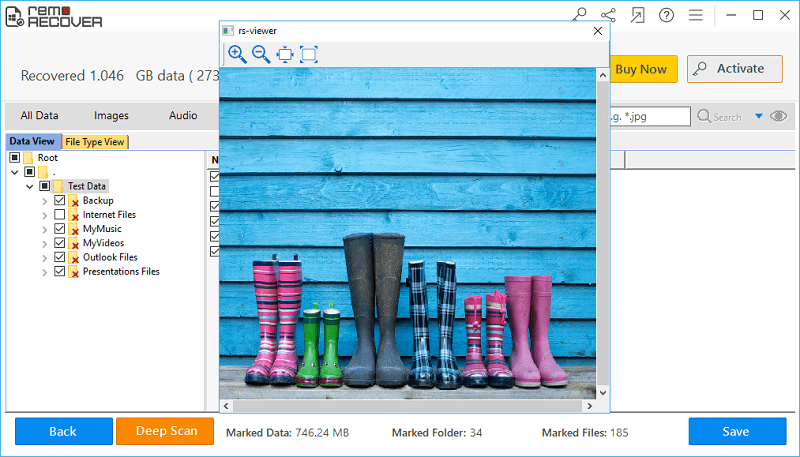
Figure 4: Preview Recovered Photo Files
Step 5: At last, after previewing the recovered photos, if you are satisfied with the recovery results of the software, then activate the license key of the tool, and save the recovered photos at the desired location of your choice.
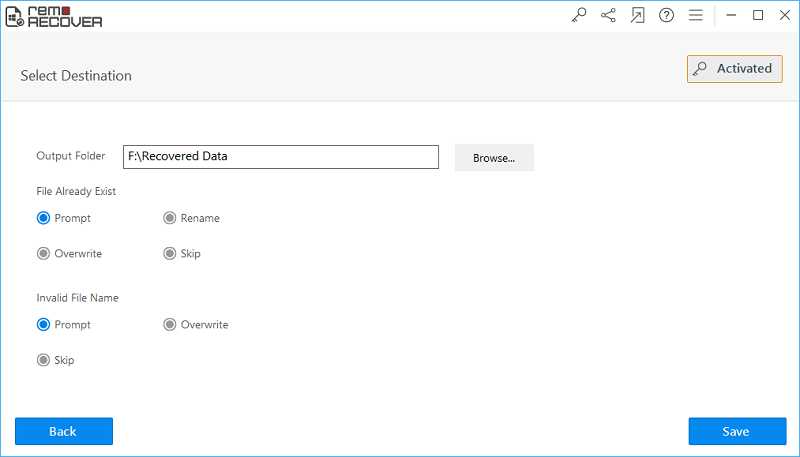
Figure 5: Save Recovered Photos
Requirements: Microsoft Windows 10, Windows 8, Windows 7, Windows Vista, Windows XP, Windows 2003 and Windows 2008